Soil that dries quickly after irrigation can make crop management frustrating. Crop residue mulching for soil moisture means keeping a protective layer of suitable plant material on the soil surface. It can reduce evaporation and protect exposed soil, but success depends on the material, crop, drainage and irrigation management.
This Vise Organic guide focuses on using residues in vegetable beds and other suitable field situations. It does not prescribe one mulch rate for every farm. Begin with a manageable trial and adapt it with local agronomic advice.
What crop residue mulch does for the soil
Straw, leaves and other plant residues act as a surface cover. FAO guidance describes how mulch can reduce evaporation, limit erosion, suppress some weeds and support soil organisms. As residues decompose, they also contribute organic matter. These processes take time; a fresh layer is not an immediate correction for poor soil fertility.
Mulching also changes conditions around the soil surface. Temperature, moisture and decomposition differ with residue type, coverage and weather. Avoid assuming a fixed percentage of water savings or a guaranteed yield increase for your field.
Choose materials before planning the application
A cheap residue is useful only if it is suitable and practical to handle. Check its origin, condition, transport cost and how it will affect the next field operation.
| Material | Practical use to consider | What to check first |
|---|---|---|
| Clean cereal straw | Surface cover between established crop rows | Weed seeds, crop disease history and whether pieces obstruct planting or irrigation |
| Dry leaves or mixed plant residues | Small trial areas where material is locally available | Identity, cleanliness and whether the layer mats together after watering |
| Coarse stalks | Situations with equipment suited to handling larger pieces | Chopping needs, labour and access for intercultural operations |
| Unknown, contaminated or visibly diseased residues | Do not introduce them into the trial | Obtain local advice on appropriate handling or disposal |
For certified production, confirm permitted materials and records with your certification adviser. “Plant based” alone does not establish that an input meets a particular certification standard.
How to use crop residue mulching for soil moisture
Plan the job around crop establishment and irrigation access. A uniform surface cover is easier to assess than deep piles separated by bare patches.
1. Check the field before covering it
Walk the plot after irrigation or rain. Mark places with standing water, blocked drip lines, uneven wetting or weak crop establishment. Resolve these issues first. Mulch should not conceal a drainage problem or prevent you from seeing how water moves through the bed.
2. Prepare a small, comparable trial
Choose neighbouring strips with similar soil and crop condition. Keep the variety, planting date and other management as similar as possible. Record the starting condition with photographs and a simple field notebook. This is a practical observation exercise, not a guarantee that differences are caused by mulch alone.
3. Place residues without burying plants
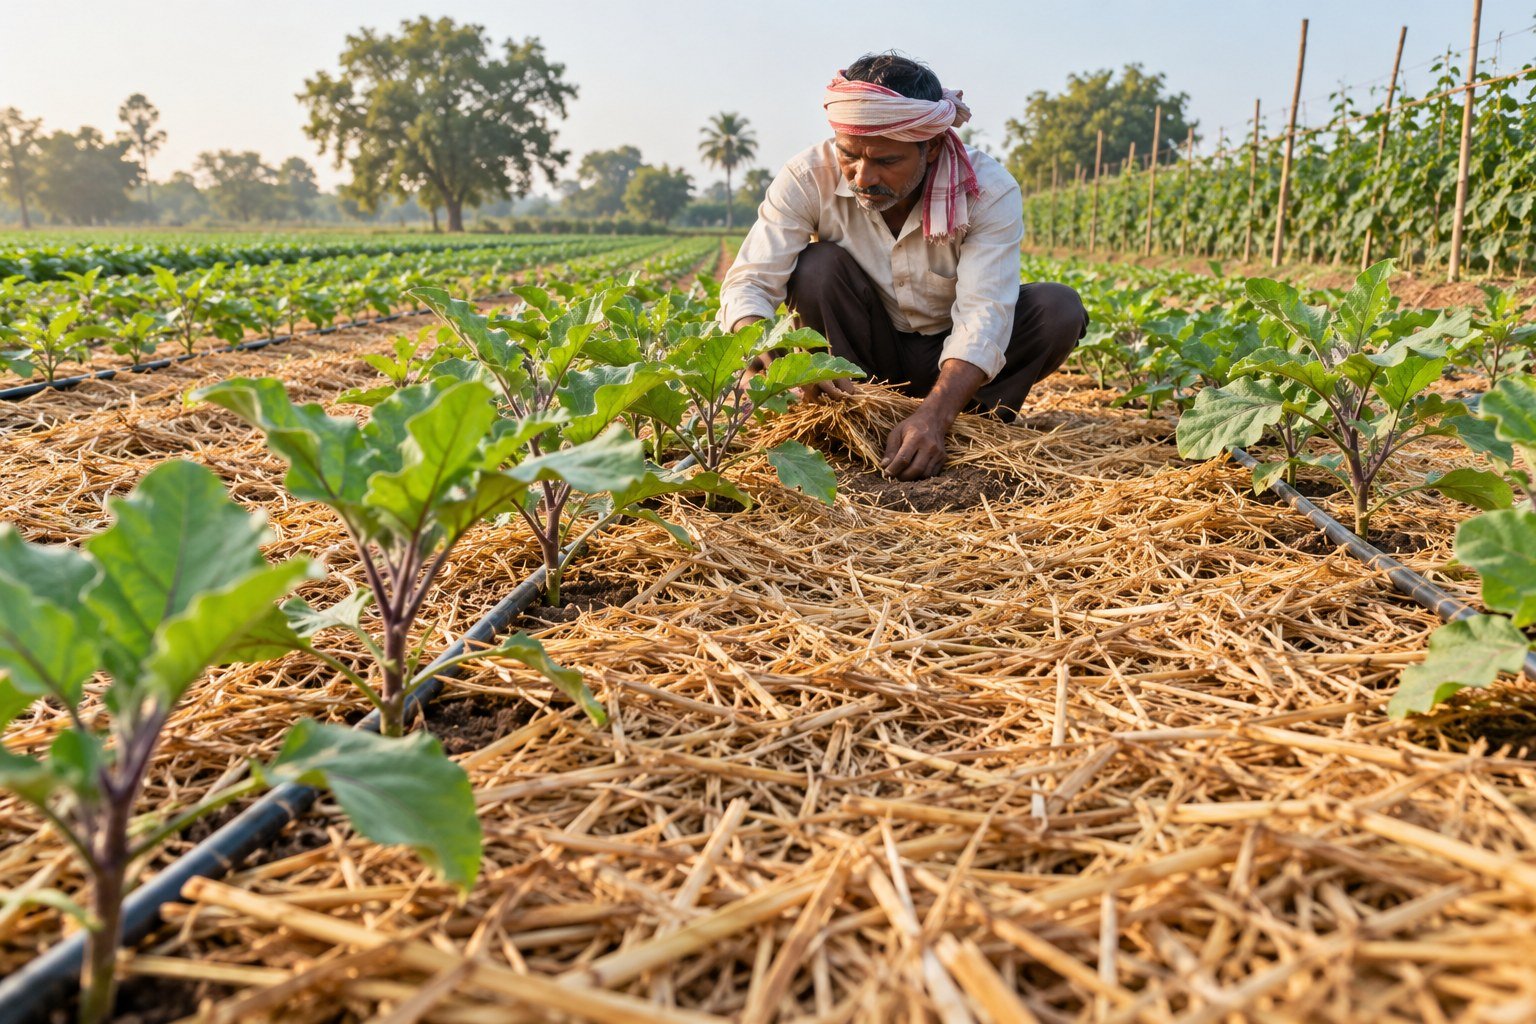
In established beds, spread suitable material between rows while keeping stems, crowns and irrigation inspection points clear. WVU Extension advises against placing mulch directly against the plant base. For direct-sown crops, get crop-specific guidance so the cover does not obstruct emergence.
Do not select a universal thickness from an unrelated crop example. Residue density, particle size, crop stage and rainfall all affect the appropriate cover. Adjust the trial with a local adviser and inspect it again after the first irrigation.
4. Check moisture beneath the cover
Lift the residue at repeatable points and inspect soil below it. Compare the root-zone moisture in both trial strips before deciding when to irrigate. A dry-looking mulch surface does not mean the root zone is dry; damp residue also does not prove that water has reached the roots.
Keep irrigation and nutrition decisions separate
Mulch can help conserve soil moisture, but irrigation still needs to match crop demand and field conditions. Keep a record of irrigation dates and duration, rainfall, wetting patterns and crop observations. Avoid automatically retaining the old watering schedule if the root zone remains wet.
Likewise, residue cover is not a replacement for a nutrient management plan. Use soil-test results and local crop recommendations to decide nutrient inputs. Read our soil testing before biofertilizers guide before changing your programme.
If a biofertilizer is part of that plan, follow its crop suitability, application method, storage conditions and compatibility instructions. Do not assume that mixing a microbial product into any residue pile is an approved application method. Our biofertilizer application timing guide explains further planning considerations.
Common mistakes to catch during the trial
Inspect the crop and soil regularly rather than judging the practice by how tidy the bed looks.
- Covering wet problem areas: investigate persistent saturation before adding more material.
- Leaving piles around stems: move material back and keep plant bases visible.
- Ignoring weeds: inspect for weeds emerging through the mulch and remove them before they establish.
- Adding residues without checking their source: review material quality before spreading it across the farm.
- Forgetting the next operation: account for harvesting, equipment movement and preparation for the following crop.
- Counting only material cost: include collection, transport, spreading and any replenishment.
UNCCD notes that biomass availability, labour and transport can constrain organic mulching. Local availability matters as much as the theoretical benefit. Residues may also have competing uses on the farm, so compare the full cost before expanding.
A simple field observation record
Use the same observation points throughout the trial. Check after application, after the first watering and during routine crop inspections.
| Record | Useful question |
|---|---|
| Residue source and application date | Can you trace what was used and when? |
| Coverage photographs | Has the layer moved, decomposed or become uneven? |
| Root-zone moisture and irrigation | Is water reaching roots without prolonged saturation? |
| Crop, weed and pest observations | Are new problems appearing in either strip? |
| Labour, transport and harvest records | Is the practice practical and economical for this crop? |
Review the record at the end of the crop. If you expand next season, keep the first expansion manageable and continue monitoring. Consider the wider sequence using our crop rotation planning guide.
Frequently asked questions
Is crop residue mulching the same as compost application?
No. Residue mulch is placed on the surface as cover. Compost is a decomposed material used according to its quality and the soil management plan. See our compost maturity guide for that separate decision.
Can mulching replace irrigation?
No. It can reduce soil evaporation, but crops still require adequate water. Check moisture in the root zone and irrigate according to crop need.
How much residue should I apply per acre?
There is no single rate suitable for every material and crop. Ask for a crop-specific local recommendation and assess coverage, emergence, moisture and field access in a trial.
Can I use residues from a diseased crop?
Do not assume they are suitable. Identify the disease and consult a local crop protection adviser before moving potentially infected material into another planting.
Should I cut fertilizer inputs immediately after mulching?
No automatic reduction is justified. Base nutrient decisions on soil testing, crop needs and local advice rather than the presence of a surface cover.
How soon should I judge the results?
Start checking placement and wetting after the first irrigation. Continue through the season; assess crop performance and total cost after harvest rather than from one photograph.
Start with a field plan you can measure
Choose clean, suitable residues, protect crop establishment and inspect water movement beneath the cover. A small, documented trial gives you a sounder basis for expansion than copying a rate from another farm.
Planning your soil health programme? Explore Vise Organic and discuss your crop, soil-test results and existing inputs with the team before selecting products.
Sources and further reading
- FAO: Mulching in organic agriculture — general soil cover principles.
- UNCCD: Organic mulching — materials, practical constraints and soil protection.
- WVU Extension: Proper soil moisture — moisture management and keeping mulch away from plant bases.
Illustration: ChatGPT-generated farming image. This guide provides general education; field decisions should follow local crop guidance and product labels.
Article Topics & Tags:
Dr. R. Sharma
Senior Agronomist at Vise Organic Research & Development Lab. Specialist in soil microbial ecology, mycorrhizal symbiotic inoculants, and organic carbon rejuvenation.